Remove text from an image with OCR
It has been a while since last blog post on CNN from scratch. I am planning to be more active and post more frequently. In the meantime I wanted to share a cool quick way of removing text from an image using OCR.
OCR
OCR stands for Object Character Recognition. With OCR you can extrapolate text from media where you would normally not be able to, for example images or videos. There are several ready-to-use OCR packages with Python such as PyTesseract. For this post I gave a try to Keras OCR but any other OCR package would be okay to use.
How to remove text from an image
Say you have some images that may contain some PII that you would like to remove since you will share the data with other users. Removing manually, especially with a lot of data, can become tedious and long process. In this case we can leverage Deep Learning and OCR to do this relatively quickly. The idea is simple.
- Feed the image to the OCR framework
- Retrieve the predictions for all bounding boxes
- Calculate mid points of the vertices (between left top and bottom corners, between right top and bottom corners)
- Calculate the thickness, which is given by the distance between either right or left top and bottom corners
- Make that area as a mask by drawing a line
- Inpaint the masked area on the original image
- Repeat for all detections
Code Example
#!/usr/bin/env python3

"""
Remove text from an image
"""
from argparse import ArgumentParser, Namespace
import keras_ocr
import cv2
import math
import numpy as np
from typing import Tuple, List

def read_image(image_path: str) -> Tuple[List, np.ndarray, np.ndarray]:
    """Read Image in Keras OCR and recognize texts"""
    pipeline = keras_ocr.pipeline.Pipeline()
    img = keras_ocr.tools.read(image_path)
    predictions = pipeline.recognize([img])
    mask = np.zeros(img.shape[:2], dtype="uint8")

    return predictions, mask, img

def inpaint(predictions: List, mask: np.ndarray, original_image: np.ndarray) -> np.ndarray:
    """Function to inpaint text in an image"""

    for box in predictions[0]:
        x1, y1 = box[1][0]
        x2, y2 = box[1][1]
        x3, y3 = box[1][2]
        x4, y4 = box[1][3]

        x_mid1, y_mid1 = midpoint(x2 , y2, x3, y3)
        x_mid2, y_mid2 = midpoint(x1, y1, x4, y4)

        line_thickness = int(math.sqrt( (x3 - x2)**2 + (y3 - y2)**2 ))

        #Define the line and inpaint
        cv2.line(mask, (x_mid1 - int((x_mid1 * 0.02)), y_mid1), (x_mid2 + int((x_mid2 * 0.02)), y_mid2), 255, line_thickness)
        inpainted_img = cv2.inpaint(original_image, mask, 7, cv2.INPAINT_NS)

    return(inpainted_img)


def midpoint(x1: float, y1: float, x2: float, y2: float) -> Tuple[int, int]:
    """Calculate mid points"""
    x_mid = int(np.divide((x1 + x2), 2))
    y_mid = int(np.divide((y1 + y2), 2))
    return (x_mid, y_mid)

def main() -> None:

    args = parse_args()
    predictions, mask, original_image = read_image(args.image_path)
    processed_image = inpaint(predictions, mask, original_image)
    cv2.imwrite('processed.jpg', cv2.cvtColor(processed_image, cv2.COLOR_BGR2RGB))

    print("Done!")

def parse_args() -> Namespace:

    parser = ArgumentParser(prog = "Remove text from image", description = __doc__)
    parser.add_argument("image_path",
                        help = 'Path to image')

    return parser.parse_args()

if __name__ == "__main__":
    main()
Sample Results
ORGINAL

PROCESSED
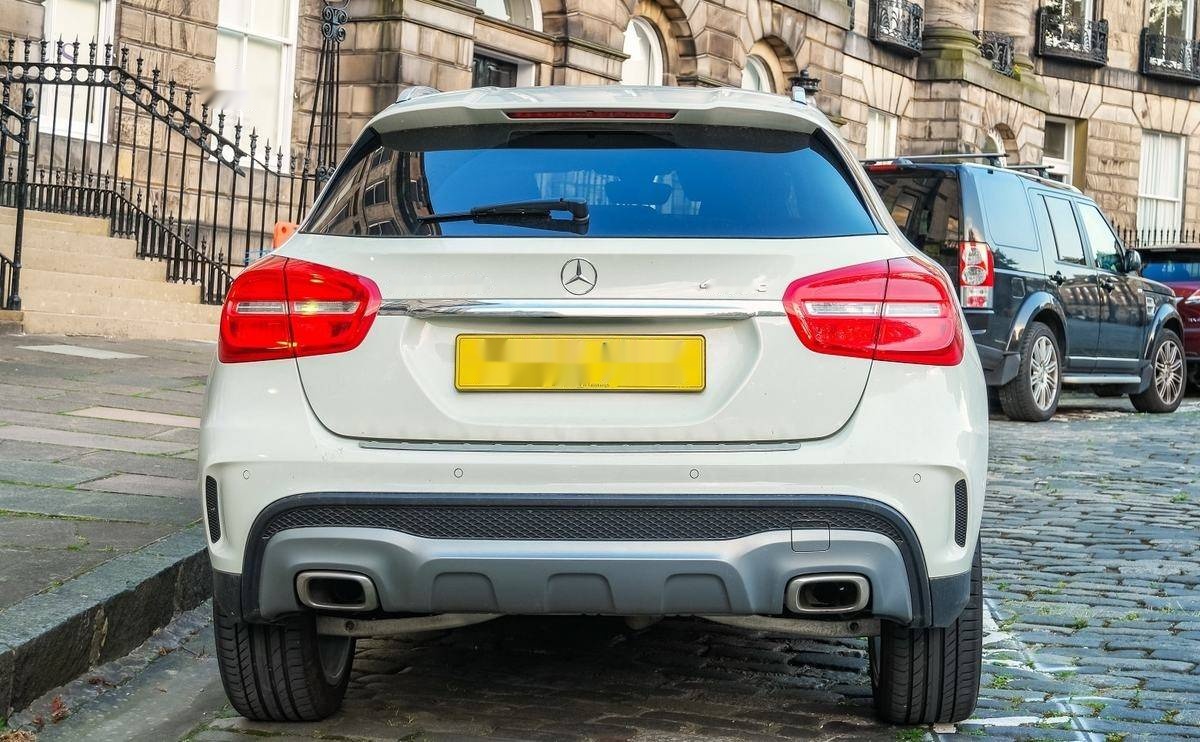
Here youy can see the car plate and car model were removed pretty neatly. Additionally, some text on the left was removed as well. This implementation could be further improved by analayzing whether the text is really a PII or not, for example with Presidio and then do the inpainting. The results are really depended on how effective the OCR framework is since this solution is mainly just grabbing detections and making masks on the bounding boxes.
Code available also here
Thank you for reading.