DCGAN - GENERATE FACES
This post is an implementation of DCGAN and an attempt to generate new Faces. Dataset of original CelebA was taken from Kaggle.
What is GAN?
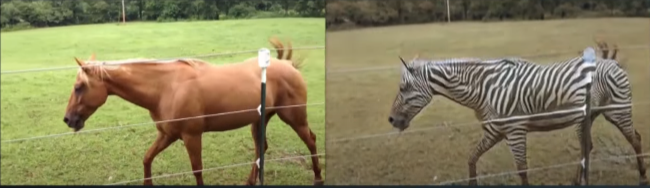
Generative Advesarial Networks, generally abbreviated as GANs, are neural networks that can create entirely new images that do not exist. GANs are used to generate realistic data, mostly used for images. Example of GANs are Pix2Pix where you can draft a sketch and the model is able to output a realistic image based on it. CycleGAN is a model that is good at image to image translation. As shown in the example below, the horse turned into a “zebra” but also the surrouding was changed, more “African” style.
How GANs work
GANs are a kind of generative model that lets us generate a whole image in parallel. GANs use a differentiable function represented by a neural network as a generator network (G)
The Generator takes in input random noise as input then runs that noise through a differentiable function to transform the noise and reshape it to a recongnizible structure. The output of a generator network is a realistic image. Running the generator with many different input noise values produces many realistic output images. The goal is for these images to be fair samples from the distribution over real data. The generator does not start out outputting realistic images. It needs to train to be able to generate them.
The training process is much different than a supervised model where we show for example an image of a traffic light and we tell the model that this is a traffic light. For GANs there is no output associated with each image. Most generative models are trained by adjusting the parameters to maximize the probability that the generator net will generate the training data set. For many models this can be very difficult to compute this probability and get around it with some kind of approximation.
GANs use an approximation called Discriminator (D) which is a second network that learns to guide the Generator. The Discriminator is a regular NN classifier. During the training process the Discriminator is shown real image from the training data half the time and half the time fake ones from the Generator. The Discriminator is trained to output the probability that the input is real. It assigns a probability near 1 to real images and near 0 to fake images. Meanwhile the Generator tries to do the opposite, it will try to generate images that the descriminator assigned probability close to 1 of being real.
Overtime the Generator is forced to generate more realistic outputs in order to fool the descriminator. The generator takes random noise values Z and maps them to output X. Wherever the generator maps more values of Z, the probability distribution over X rapresented by the model becomes more dense. The descriminator outputs high values wherever the density of real data is greater than the density of generated data.
In other words, the generators moves its samples into areas where the model distribution is not yet dense enough. Eventually the generators’s distribution matches the real distribution.
We can think of this process as being like a competiton between counterfeiters and police where the Generator is the group of counterfeiters and the Discriminator is the Police. The group of counterfeiters will try to produce fake money and pass it off as real. The police will try to identify if the money is fake or real. Overtime the police will get better at detecting fake money but so also the counterfeiters will get better at faking. Eventually the counterfeiters are forced to make perfect replicas of real money.
Training a GAN
It is fundamental to choose an overall good architecture for the GAN. For a very simple task like generating small pics 28 by 28 from the MNIST dataset, a fully connected network will work. The important thing is that both generator and descriminator have at least 1 hidden layer. For the hidden units many activation functions will work but LeakyReLU are popular as it makes sure that the gradient can flow through the entire architecture. The is more important for GANs as the only way for the generator to learn is to receive a gradient from the discriminator. A popular choice for the output of the Generator is tanH, so a value between -1 and 1. For most versions of GANs the output of the discriminator is a Sigmoid (0, 1) as it needs to be a probability.
GANs require two optimization algorithms that run simultaneously. We define a loss for the generator and the discriminator, then we pass this to an optimizer, normally Adam (as in DCGAN) to minimize the loss for both the generator and the discriminator.
To set up the discriminator loss, we need to remember that we want the discriminator to classify the images passed to it, if real or fake (1 or 0). This is just a Binary Classification task. For the loss we can use as criterion the nn.BCELoss(D_out, labels). BCE = Binary Cross Entropy. One place where often people make a mistake is they forget to use the numerical stable version of Cross Entropy where the loss is computer using the logits. The logits are the values produced by the discriminator right before the sigmoid. If you use the probability values that come out of the sigmoid there can be rounding issues when the sigmoid is near 0 or 1. In this case, for GANs, there is a trick to multiply the zero or one labels by a number that is just a little smaller than 1, e.g. 0.9 as pointed in the picture above. This is a label smoothing strategy to regularize normal classifiers. It helps the discriminator to generalize better and avoid learning to make extreme predictions when extrapolating.
For the generator loss you want to set up another cross entropy loss but with the labeles flipped. The generator will maximixe the log probability of the wrong labels.
Many people use negative d_loss for g_loss which is very intuitive as it corresponds to having the generator maximize the loss for the discriminator. However this does not work very well in practice and it is not recommended to implement it. This is because the gradient of d-loss is zero whenever the discriminator is winning. Using negative d-loss as g-loss foreces the generator to maximize cross-entropy while we really want both the discriminator and generator to minimize the cross-entropy.
To scale GANs up to larger images we can adapt a similar architecture where convolutional layers are used. The input will be the vector Z which has to through a reshape as the CNN expects a 4D Tensor with one axis for different examples in the mini-batch, one axis for the different features maps and then the width and height axes. Normally with CNN, the image in input is a very tall and wide image with 3 feature maps (Red, Blue and Green color channels) When going thorugh Convolutional layers and pooling, the image ends up being a short and narrow feature maps. The DCGAN project introducted the idea of increasing the size of the feature maps just by using a convolution transpose op with stride greater than 1.
This means that every time we move the convolution kernel by 1 pixel, in the input map we move by 2 or some other larger number of pixels in the output map.
Finally you really want to use batch normalization or one of the follow-up methods based on batch normalization in most of the layers of the network. The DCGAN authors suggest to use it on all layers except for the output layer of the generator and input layer of the discriminator.
So to recap:
- Convolutional Transpose
- Adam
- Label Smoothing and Cross Entropy
- Batch Normalization
DCGAN
Deep Convolutional Generative Adversarial Networks is made by a generator and discriminator.
The Discriminator is a convolutional neural network which has at the end a fully connect layer that will categorize 1 for real 0 for fake.
No maxpooling layers!
Only convolutional layers with stride = 2 For each 2 pixel in the input img, there will be 1 pixel in the conv layer. This will downnsampling by a factor of 2. All hidden layers have batch normalization and leaky ReLU applied to the output.
A Leaky ReLU function will reduce any negative values it sees by multiplying those values by a small coefficient called negative slope.
Batch Normalization scaled the layers output to have a Mean = 0 and Variance = 1. Thanks to this, the training of the network is faster and more efficient and reduces issues with poor parameter initialization. For the Generator instead, we have Transpose Convolutional Layers also called Deconvolutional Layers. In this case when passing through the convolutional layer, the input will double in size. In the Generator we first need to connect the input Z vector to a fully connected layer and then reshap it to a 4 by 4 with depth 512 The x, y dimensions are doubling for each layer but the depth is half each time. We use batch normalization and ReLu on all hidden layers except the last out where we use tanh.
Batch normalization optimizes network training. It has been shown to have several benefits:
Networks train faster – Each training iteration will actually be slower because of the extra calculations during the forward pass and the additional hyperparameters to train during back propagation. However, it should converge much more quickly, so training should be faster overall. Allows higher learning rates – Gradient descent usually requires small learning rates for the network to converge. Makes weights easier to initialize Provides a bit of regularization
When using Batch Norm we do not set a bias. Why no bias? The reason there is no bias for our convolutional layers is because we have batch normalization applied to their outputs. The goal of batch normalization is to get outputs with: mean = 0 standard deviation = 1 Since we want the mean to be 0, we do not want to add an offset (bias) that will deviate from 0. We want the outputs of our convolutional layer to rely only on the coefficient weights.
CODE IMPLEMENTATION
import torch
device = torch.device('cuda' if torch.cuda.is_available() else 'cpu')
device
##Hyperparameters
LEARNING_RATE = 2e-4
BETA1 = 0.5
BETA2 = 0.999
CONV_DIM = 64
DECONV_DIM = 64
BATCH_SIZE = 64
Z_SIZE = 100
IMG_SIZE = 64
N_EPOCHS = 50
# Let's take a look at the images first
import torchvision.transforms.functional as F
import torch.nn as nn
from torchvision import transforms as T
from torchvision.utils import make_grid
import torch.optim as optim
import torchvision.datasets as dset
import matplotlib.pyplot as plt
import torchvision.utils as vutils
from torch.utils.tensorboard import SummaryWriter
import numpy as np
#Loading the data
def get_dataloader(batch_size, image_size, data_dir, num_workers=2):
"""
Function to load the data and transform it. Images are resized by image_size parameter
"""
dataset = dset.ImageFolder(root=data_dir,
transform=T.Compose([
T.Resize(image_size),
T.CenterCrop(image_size),
T.ToTensor()
]))
dataloader = torch.utils.data.DataLoader(dataset=dataset,
batch_size=batch_size,
shuffle=True,
num_workers=num_workers)
return dataloader
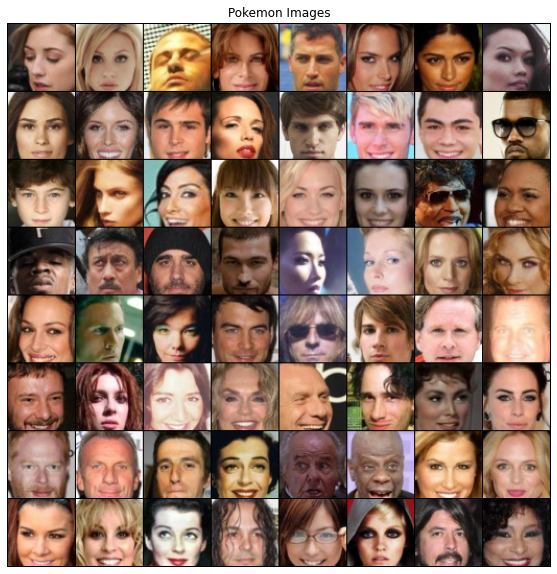
def display_image(images):
"""
Function to display dataloader batch
"""
plt.figure(figsize=(10, 10))
plt.axis('off')
plt.title('Pokemon Images')
plt.imshow(np.transpose(vutils.make_grid(images[0].to(device)[:64], padding=1, normalized=True).cpu(), (1,2,0)))
#Generating Data Loader and displaying first batch
celeb_loader = get_dataloader(BATCH_SIZE, IMG_SIZE, 'dataset/processed_celeba_small')
dataiter = next(iter(celeb_loader))
display_image(dataiter)
##Helper functions to create conv-deconv layers

#This one for Discriminator
def add_conv_layer(in_channels, out_channels, kernel_size= 4, stride=2, padding=1, batch_norm=True, leaky_relu=True, sigmoid=False):

    layers = []
    conv_layer = nn.Conv2d(in_channels, out_channels, kernel_size, stride, padding, bias=False)
    layers.append(conv_layer)

    #Checking if Batch Norm layer to be added
    if batch_norm:
        layers.append(nn.BatchNorm2d(out_channels))

    #Checking if leaky relu to be added
    if leaky_relu:
        layers.append(nn.LeakyReLU(0.2))

    if sigmoid:
        layers.append(nn.Sigmoid())

    return nn.Sequential(*layers)

#This one for Generator
def add_deconv_layer(in_channels, out_channels, kernel_size= 4, stride=2, padding=1, batch_norm=True, relu=True, tanh=False):

    layers = []
    deconv_layer = nn.ConvTranspose2d(in_channels, out_channels, kernel_size, stride, padding, bias=False)
    layers.append(deconv_layer)

    if batch_norm:
        layers.append(nn.BatchNorm2d(out_channels))

    if relu:
        layers.append(nn.ReLU(True))

    if tanh:
        layers.append(nn.Tanh())

    return nn.Sequential(*layers)

    #Function for initalize weights to help model convere.

def initialize_weights(model):
    '''
        Based on the paper the weights were initializedfrom a zero-centered Normal distribution with standard deviation of 0.02
    '''
    for m in model.modules():
        if isinstance(m, (nn.Conv2d, nn.ConvTranspose2d, nn.BatchNorm2d)):
            nn.init.normal_(m.weight.data, 0.0, 0.2)
Note: in other implementations, BatchNorm2d was initialized with 1.0 and 0.2 but during my tests it gave me worse results. Not sure why though.
##Classes for Discriminator and Generator


class Discriminator(nn.Module):
    def __init__(self, conv_dim):
        '''
        Initialize Discriminator
        :param conv_dim: Depth of the first convolutional layer
        '''
        super(Discriminator, self).__init__()
        self.disc = nn.Sequential(
            add_conv_layer(3, conv_dim, batch_norm=False), #First conv layer no batch norm
            add_conv_layer(conv_dim, conv_dim*2),
            add_conv_layer(conv_dim*2, conv_dim*4),
            add_conv_layer(conv_dim*4, conv_dim*8),
            add_conv_layer(conv_dim*8, 1, stride=1, padding=0, batch_norm=False, leaky_relu=False, sigmoid=True)
        )

    def forward(self, x):
        return self.disc(x)


class Generator(nn.Module):
    def __init__(self, z_size, deconv_dim):
        '''
        Initialize Generator
        :param z_size: Length of the input latent vector z
        :param deconv_dim: Depth of the input to the last transpose convolutional layer
        '''
        super(Generator, self).__init__()
        self.gen = nn.Sequential(
            add_deconv_layer(z_size, deconv_dim*8, stride=1, padding=0),
            add_deconv_layer(deconv_dim*8, deconv_dim*4),
            add_deconv_layer(deconv_dim*4, deconv_dim*2),
            add_deconv_layer(deconv_dim*2, deconv_dim),
            add_deconv_layer(deconv_dim, 3, batch_norm=False, relu=False, tanh=True)
        )

    def forward(self, x):
        return self.gen(x)


## Function to create Network

def create_DCGAN(d_conv_dim, g_deconv_dim, z_size):

    D = Discriminator(d_conv_dim)
    G = Generator(z_size, g_deconv_dim)

    #Initialize weights
    D.apply(initialize_weights)
    G.apply(initialize_weights)

    return D, G

#Setting up the Network
D, G = create_DCGAN(CONV_DIM, DECONV_DIM, Z_SIZE)

##Moving To GPU

D.to(device)
G.to(device)

#Defining loss and optimizer

criterion = nn.BCELoss()

optimizer_gen = optim.Adam(G.parameters(), lr=LEARNING_RATE, betas=(BETA1,BETA2))
optimizer_disc = optim.Adam(D.parameters(), lr=LEARNING_RATE, betas=(BETA1,BETA2))
fixed_noise = torch.randn(BATCH_SIZE, Z_SIZE, 1, 1, device=device)

#Tensorboard

real_logs = SummaryWriter(f"logs/real_faces")
fake_logs = SummaryWriter(f"logs/fake_faces")

def scale(x, feature_range=(-1, 1)):
    ''' Scale takes in an image x and returns that image, scaled
       with a feature_range of pixel values from -1 to 1.
       This function assumes that the input x is already scaled from 0-1.'''
    # assume x is scaled to (0, 1)
    # scale to feature_range and return scaled x
    x = x * (feature_range[1] - feature_range[0]) + feature_range[0]

    return x

def train(D, G, n_epochs, print_every=50):

    step = 1

    for epoch in range(n_epochs):

        for batch_id, (real_images, _) in enumerate(pokemon_loader):


            #Discriminator training
            optimizer_disc.zero_grad()
            real = real_images.to(device)
            real = scale(real)
            #labels = torch.full((batch_size,), 1, dtype=real.dtype, device=device)
            #Real
            discriminator_real = D(real).view(-1)
            loss_discriminator_real = criterion(discriminator_real, torch.ones_like(discriminator_real).to(device))
            loss_discriminator_real.backward()
            D_x = discriminator_real.mean().item()

            #Fake
            noise = torch.randn(BATCH_SIZE, Z_SIZE, 1, 1, device=device)
            fake_images = G(noise)
            #labels.fill_(0)

            discriminator_fake = D(fake_images.detach()).view(-1)
            loss_discriminator_fake = criterion(discriminator_fake, torch.zeros_like(discriminator_fake)).to(device)
            loss_discriminator_fake.backward()
            #Total loss discriminator
            total_loss_discriminator = loss_discriminator_real + loss_discriminator_fake
            optimizer_disc.step()


            ##Generator
            optimizer_gen.zero_grad()
            #labels.fill_(1)
            generator_output = D(fake_images).view(-1)
            loss_generator = criterion(generator_output, torch.ones_like(generator_output).to(device))
            loss_generator.backward()
            optimizer_gen.step()


            #Printing losses and logging to tensorboard

            if (batch_id % print_every == 0):
                print(f'Epoch [{epoch}/{N_EPOCHS}] | d_loss: {total_loss_discriminator:.4f} | g_loss: {loss_generator:.4f}')

                with torch.no_grad():
                    fake = G(fixed_noise)

                    img_grid_real = make_grid(real_images[:32], normalize=True)
                    img_grid_fake = make_grid(fake[:32], normalize=True)

                real_logs.add_image("Real", img_grid_real, global_step=step)
                fake_logs.add_image("Fake", img_grid_fake, global_step=step)

                step += 1
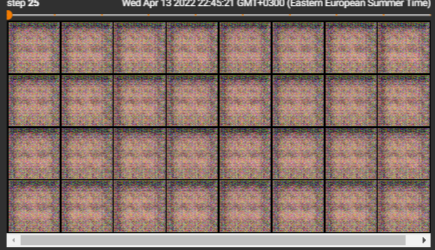
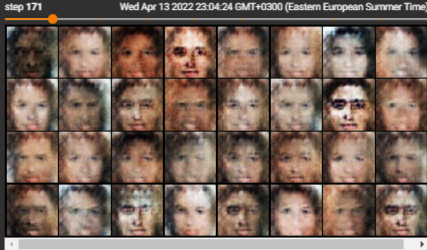
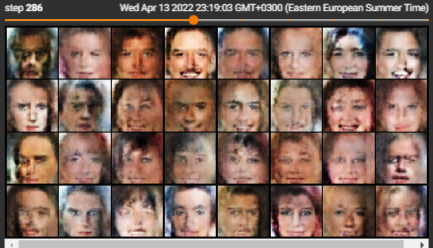
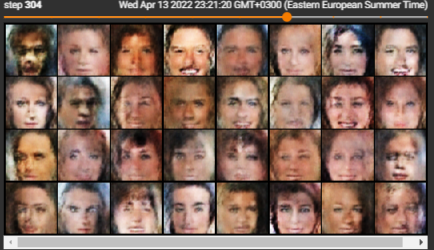
Results
The results are not super realistic and I did not train for super long but you can see the progress from just noise to resemble some human faces, which is very cool.